Adding Categories to Your Drupal Commerce Site
Although this tutorial is based on adding a category or brand, if you have other taxonomies on your site such as color, size, fitment(make, model, year), or any others listed under taxonomy, they can all be added with these same instructions.
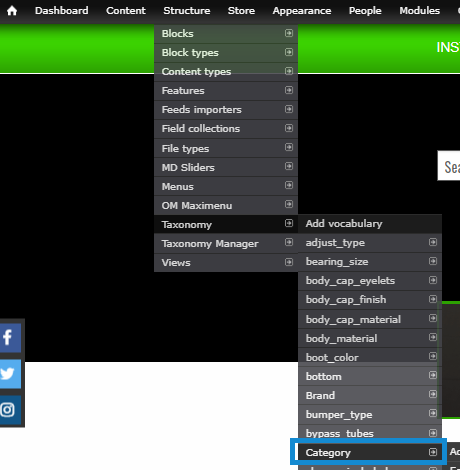
1. To get to your taxonomy vocabulary, in your admin menu hover over and follow through “Structure” -> “Taxonomy”, and select which one you are adding to. In this tutorial case, “Category”.
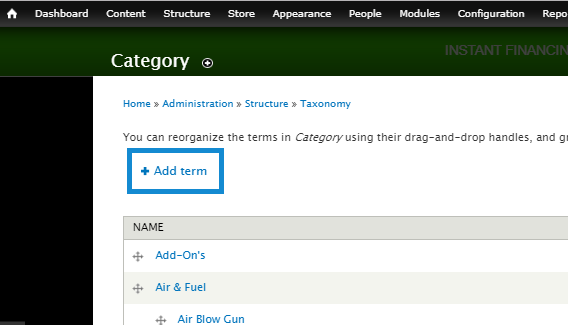
2. On the following overlay page, you will see all your Categories listed out with their subtrees. At the top of the page, you’ll see “+ Add term”. Click on that.
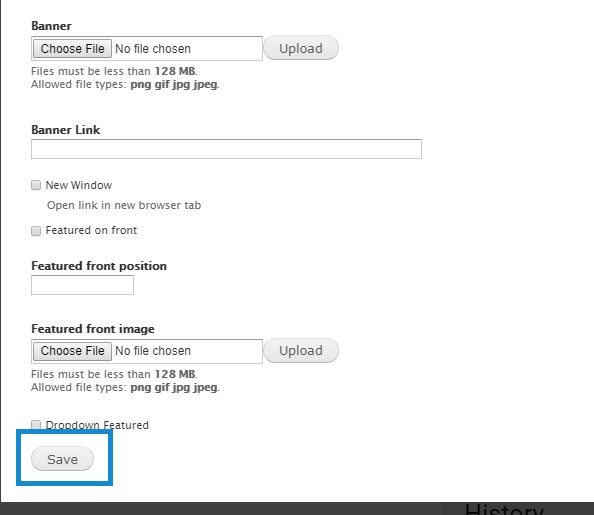
3. On the next page at the top, simply type in the new Category name in the required “Name” field. Now you can also take advantage of the Category imagery. If you have a category featured section on your front page, you can save time in the future by adding the category image now when you scroll to the bottom before saving. That field is usually named “Featured Image”, “Front Featured Image”, or if you have a banner for that category it will have that option here as well.
4. Keep in mind, since you’re adding the Category, if you set it as featured immediately before any products are attached, the featured link will lead to an empty products page which is undesirable. If you are adding products to it immediately after creating the category then go ahead, but keep that in mind.
5. When you’re ready to create the Category, simply scroll down and click “Save”.