Creating & Working with Webforms
Here we go over managing webforms on your Drupal 7 site. How to create webforms and add your recipient email, as well as set up the reply-to email properly. You can either create a webform as an individual page, or add a form as a block to an existing page.
1. There are multiple ways to create webforms on your site. They can either be added to already existing content, or as an independent webform page.
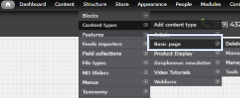
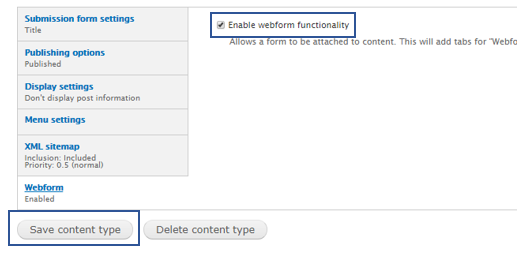
a. To add a webform to existing content, such as a basic page, you will need to ensure that the permission to create a webform is enabled on that content type. You can check this permission by going through Structure -> Content Types -> [select the content type you are working with]. After getting to the content type settings, at the bottom of the page select the grey “Webform” settings tab. Make sure the “Enable webform functionality” option is selected. Then click “Save content type” at the bottom.
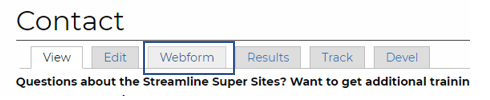
After making sure webforms are enabled for the content type, now you can add the actual form! Navigate to the page you want to add the form to and select the “Webform” tab at the top of the page content. Now you can move on to step 2.
b. To add a single webform, not attached to any existing content type, in your admin menu select Content -> Add content -> Webform. Now you’ll see the “Create Webform” overlay. Give your webform a title and click “Save” at the bottom.
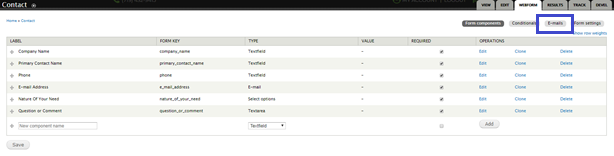
2. Once you’ve created the webform, it’s time to add some fields. At this point, you should be on a screen that looks like this, and has your webform name at the top:

This is where fields like the Name, Phone Number, Email, and any other fields are added to your form.
a. The first column, Label, will be the name of the field. It’s what the user will see as well.
b. The second column, Form Key, is auto-generated once the label is made so you can ignore it.
c. The third column, Type, is going to vary depending on what you’re asking for. Here is a quick description of the most commonly used field types:
i. Textfield – A simple textbox, non-resizable. Can be used for names, phone numbers, and addresses.
ii. Textarea – A text-box that will display slightly taller and wider that a textfield, and it will have resizable options for the user. Can be used for addresses, messages, any long-texts.
iii. E-mail – If the field item is meant for an email, it MUST be an e-mail type field. If an e-mail field is not set up as an e-mail type, you will not be able to respond to the form submissions.
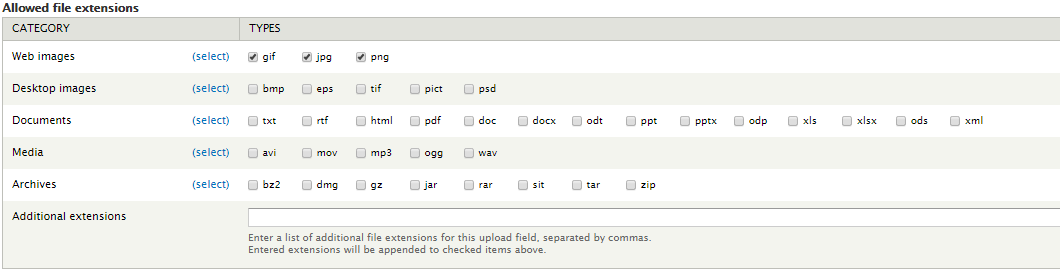
iv. File – Will allow the user to attach a file or image based on what you specify in the options after clicking “Add”. In the options, there will be a table with checkboxes for easy selection, like so
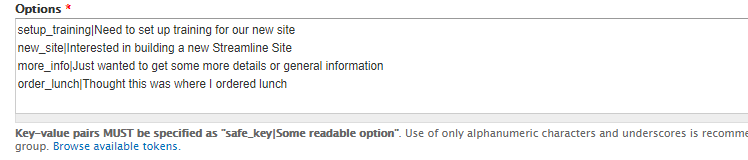
v. Select Options – This type has a bit of wiggle room. By default, it is a select list that allows only one option, but once you’re in the options it will allow you to specify if the user can select multiple items, or even if you want a dropdown box. There is also a textarea within the options where you will add the choices. This area is of course required. There are instructions underneath the box. Each item should have a unique key for the system to id the option, the pipe symbol, which can be found above the “Enter” key on your keyboard (on some Mac keyboards it’s to the left of the “Enter” key), and the actual option to display to the user. It should look something like this when you’re finished:
d. The fourth column, Value, is also something that can be ignored (like the key).
e. The fifth column, Required, is where you can determine if the user is required to fill out this field.
f. Once you specify the Label, Type, and if it is Required, you can click “Add”. You will then be taken to the options page for your field. If it is something like a textfield, textarea, or e-mail you can simply leave everything on default and click “Save component” at the bottom. If it’s the file or select options field, fill out the options accordingly with the help of the descriptions above, and click “Save component”.
3. Once the fields are all set-up, an E-mail will need to be added. This e-mail will determine where form submissions are sent. If no e-mail is entered, no one will be alerted on your end if a new submission is made. To do this, you’ll want to go to E-mails in your webform settings. This can be found here:
On the next page in the second “E-mail to” column, “Address:” should already be selected. This is where you place the address you would like form submissions to be sent to and click “Add” to the right. Next you will be brought to a page where you can customize the e-mail subject, the from address, the from name, and the reply-to address. **The email reply-to address should be placed on the Email component. This will ensure that when you respond to the form, it sends your response to whatever email the user entered on their form (this is why step 2c-iii is so important). Once you are finished customizing this page, select “Save e-mail settings” at the bottom.
4. If you would like to get back to the fields section after completing the e-mail setup, you can simply click “Form components” in the upper right part of the page.
5. Do not forget to click “Save” at the bottom. If the webform was being added to existing content, this is when you are finished! Yay!
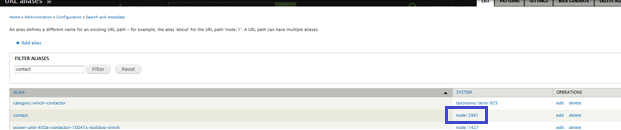
6. If the webform was an individual page, and you need to add a link somewhere for it, that can be done easily. In your admin menu, to go “Configuration” -> “Search and metadata” -> “URL aliases”. This will bring you to a page with a filter at the top. Enter the name of your webform in the search and click “Filter”. Highlight and copy the [node/####] that is under the second “SYSTEM” column for your webform. This is the path you will use if you’re adding the webform as a link somewhere else on your site.