Managing MD Sliders
This tutorial will go over how to delete and add slides; then how to add text, images, links, and videos to MD Silders, which are mostly used for site banners for Drupal 7.
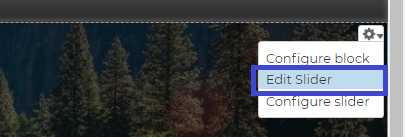
1. There are two ways to get to the MD slider settings. You can hover your mouse over the slider on the front end and click the gear that pops up to the top right corner, then click “Edit Slider”:
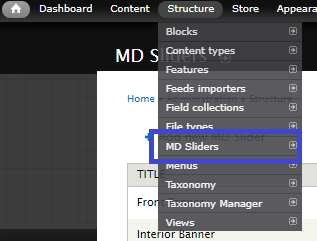
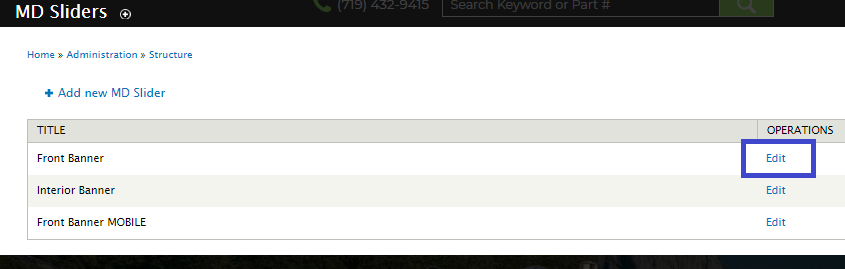
You can also go through the admin menu and click “Structure” -> “MD Sliders”, and select edit for which slider you want to edit:
2. To delete a slide, all you need to do is hover over the slide tab, and you’ll see a little “x” pop up. Click the “x” and save.
3. To add a new slide:
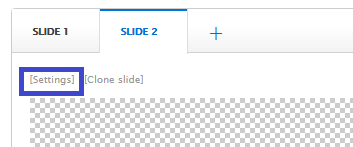
a. At the top of the page, you’ll see tabs titled SLIDE 1, SLIDE 2, etc. Click on the plus sign to the right of the last tab, then when the new blank slide opens, click on [Settings]:
In the pop-up, click on [Choose Image]. In the next popup, click on Choose File, select the image you want to use as the wide spanned background for that slide, then click Upload -> Next -> leave the Destination as default, which is usually “Public local…” and click Next. Then you will have the option to change the name of the image, or simply leave it as default and click Save. This will take you back to the slide setting popup. You should see your image under the Choose Image option. Make sure to select a transition from the options list, then click Save:
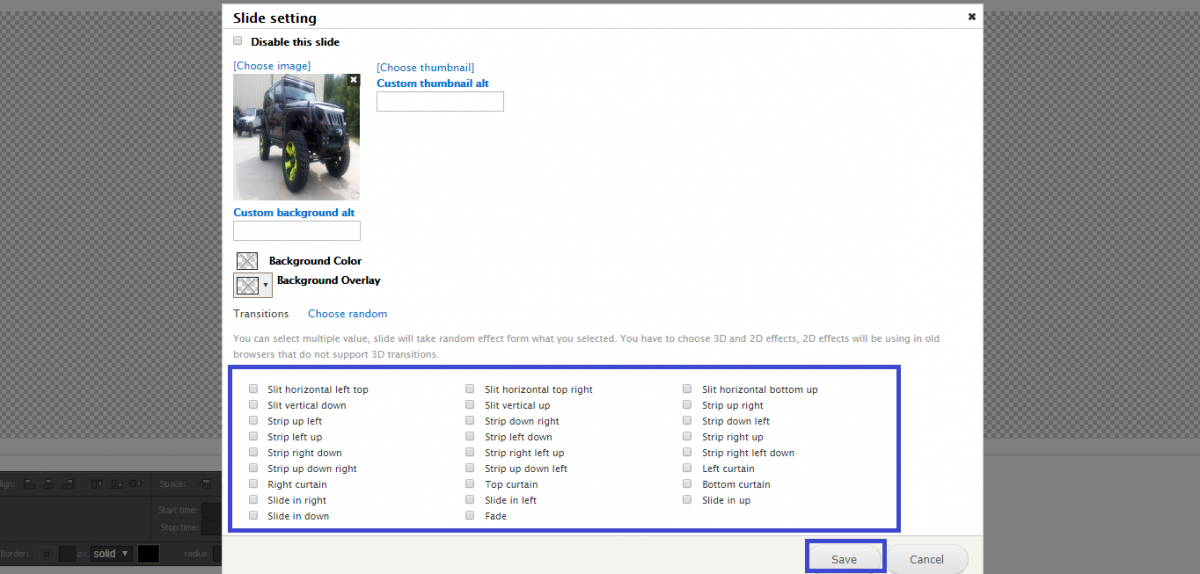
A tip for the transitions option: If you hover over the options, it will display how it looks. Also, unless you’re going for a certain effect, make sure to be consistent with any current slides you already have made. You might want to double back on another slide, and check what transition was already chosen.
You’ll now see the image in the grey area for that slide. If this is all you needed to do, simply click Save at the bottom.
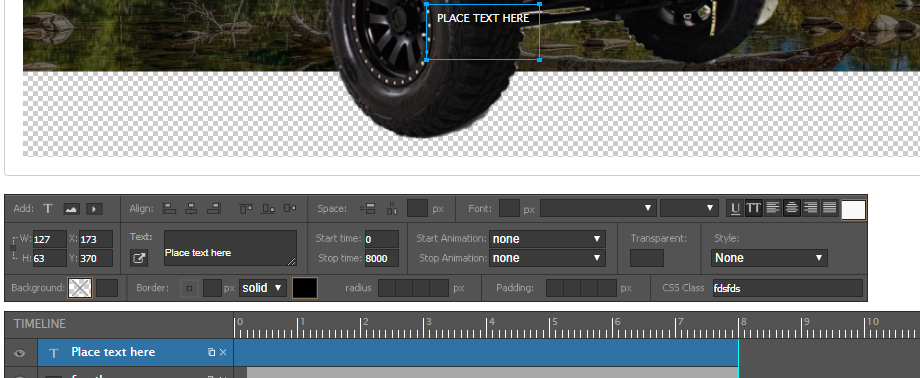
4. To add text and links to a slide: Adding text and links both begin in the same place. Navigate to the slide you want to add the text/link to, and near the bottom of the page, you’ll see a dark grey box like shown below. In the upper left corner of that box, select the "T".

a. To add text: That grey box will now change into the settings for the textbox. In the timeline on the bottom, a row will be added for the textbox as well. You can drag the textbox around on the slide, resize it, edit the font format, etc. If you want to delete the box, click the small “x” for the textbox in the timeline below.
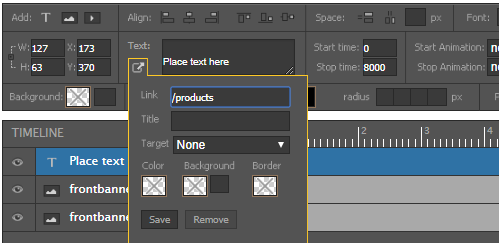
b. To add links: Click on the add link button in the text area. It looks like a little box with a white arrow pointing out to the upper right corner. Remember that if you are adding a link over the image in general, to erase the text in the text area. The textbox by default has “Text” written in it. The link area will expand. This link area will auto-fill your sites main URL, so the only thing you need to type in that first link field is the rest of the URL for the page you want this link to go to. For example, if you want it to go straight to your products page, “/products”, if you want to go directly to a category, you can open the category on another tab in your browser and copy the rest of the URL (which will look something like this: /products/category/atvutv). Leave the rest of the fields blank and click save. It should look something like this:
5. To add an image to overlap the slide background itself, click on the “add new image” icon, which is to the right of the "T" icon you would select if you were adding text. In the popup, it will go through the same steps to add this image as it does to add the actual slider image. After adding it in, you’ll be able to resize it, and move it wherever you want it to be on your slide.
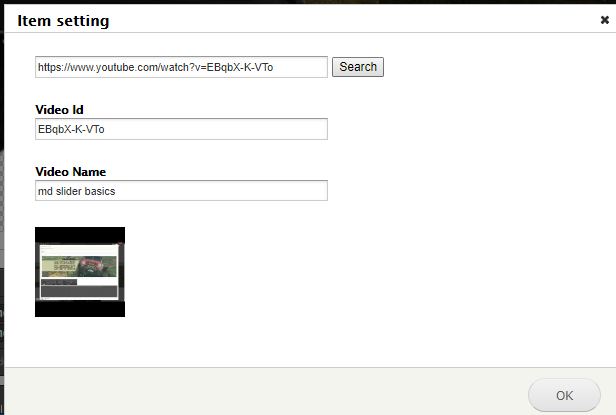
6. To add videos to overlap your main slider image, click on the “add new video” icon, which is to the right of the image icon.
a. In the pop-up, you’ll want to paste the URL for the video that you’re adding in the first field, then click the search button. The MD Slider supports YouTube and Vimeo. A Video Id and the name will auto-populate, then click OK.
You can now drag or resize the video on the slide.
7. Remember, for ANY changes, or additions, to always click save when finished.