Using the eBay Module for Product Listings
There are 2 ways to list your products on eBay. You can either list one at a time, or list several products in bulk. It’s a simple process, since the eBay module does most of the work for you. Here we go over how to work with it.
1. To list one product: In your admin menu, go through “Store” -> “eBay Listings”. This will bring you to a page that lists all of your current eBay listings. If you don’t have any listings yet, it will simply be blank like this:
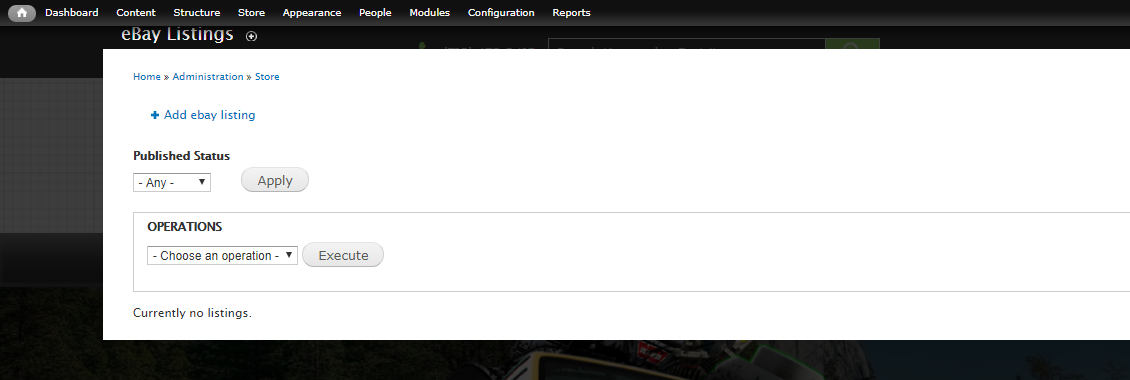
2. If you have current listings, this is where you can go to delete them, or edit them. You would see an “edit” and “delete” button to the far right.
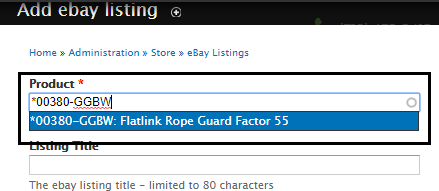
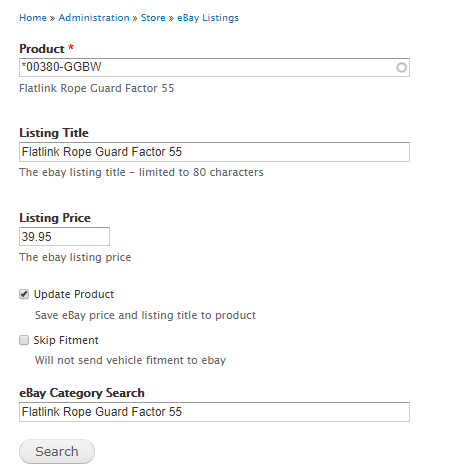
3. To create a new listing click on the blue “+ Add eBay listing” at the top of the page. On the next page, in the Product field paste or begin typing the SKU for the product you want to list. Once the item pops up in the dropdown, click it and the listing title, price, and category search will automatically fill out.
__________________________________________________________________
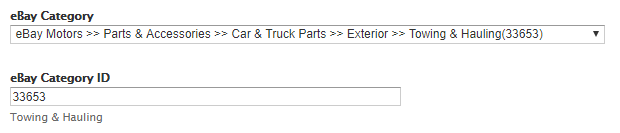
4. Below the auto-filled eBay Category Search, click on the Search button, and eBay will search for categories that match your product that you can decide from. Once you get the green “Hit” check above that field, select on the eBay Category dropdown and choose the best fitting category for your product.
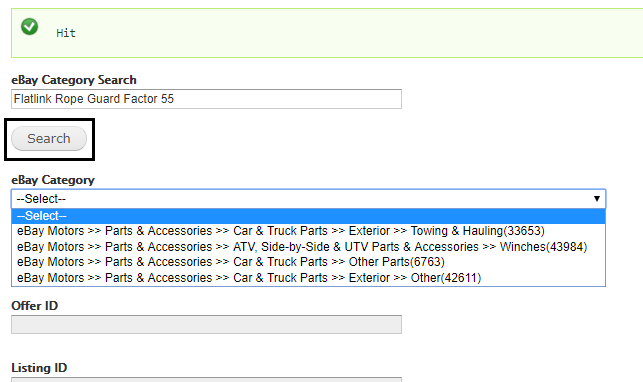
When you choose from the select list above, the eBay Category ID will automatically load. It’s usually pretty quick, but it might take a second.
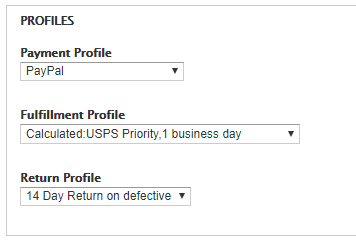
5. In the PROFILES area, all of these items need to be set up or eBay will ignore your listing. The Payment Profile should already have been set up through your paypal account, the same as Fulfillment Profile. Then the Return Profile is subjective depending on what you want.
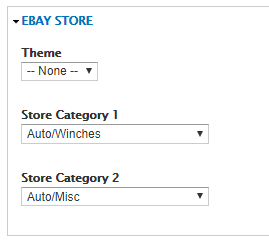
6. In the EBAY STORE area, you can set a theme if you already have one set up, or just leave it as “None”. It also gives you the option of adding two more categories to list your product under.
7. When you’re finished, scroll to the very bottom and click “Submit”.
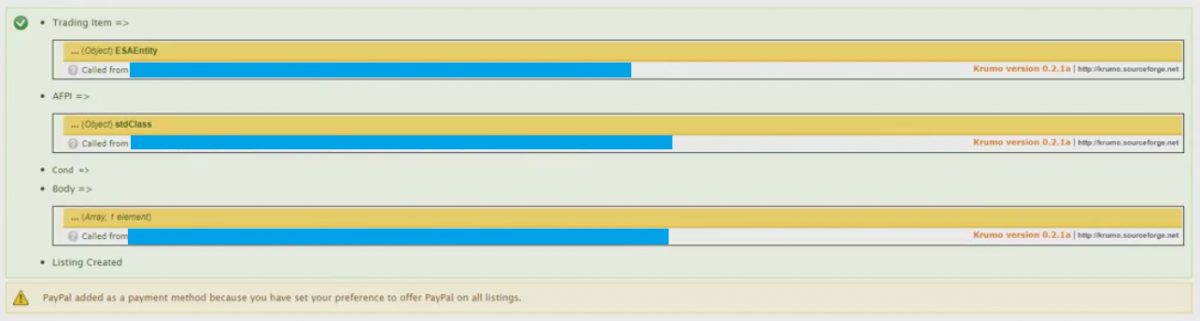
8. After your site finishes configuring with eBay, you might see some messages up top in Yellow, but as long as there is a green check in the upper left corner, that means everything worked out. So if you have a screen that looks something like the one below then everything is good (the blue boxes are to basically censor current site info).
9. If you go back to your eBay listings page via step 1, you’ll see the listing you just uploaded. :)
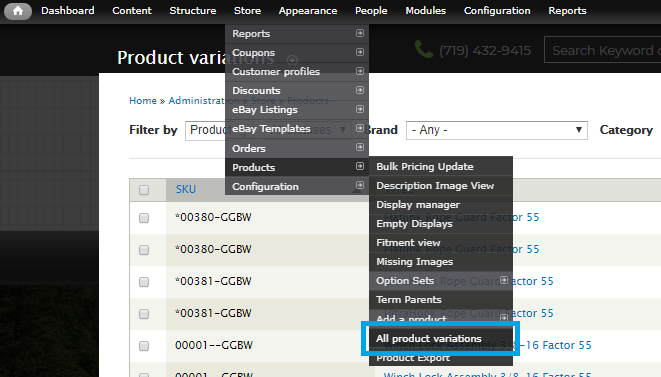
10. To list multiple products in bulk: In your admin menu, go to “Store” -> “Products” -> “All product variations”.
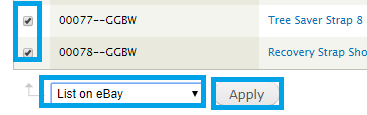
11. You can use the filters you have set up already to filter through and find your products. Nearly all of our sites have a brand and categories filter, but you might have conditions, type, etc. as well. Basically, filter or search through this products list, and check the box to the far left of your product. When you have all your products selected, scroll to the bottom of the page, select “List on eBay” for the bulk operation and click “Apply”.
12. The next page has pretty much the same configuration settings as mentioned above, but formatted a bit differently to make it easier to apply to multiple products.
13. The “PROFILES” area is the same as step 5, just like how the theme is the same as step 6, but the categories are in the next section.
14. Each of the products you selected will have its own categories options. The eBay Category box will be auto-filled for you, but if you can expand it, you have the option of changing the product to a category that better suits it. You’ll also notice that instead of being beneath the “Theme” option, the extra category options are in this area as well.
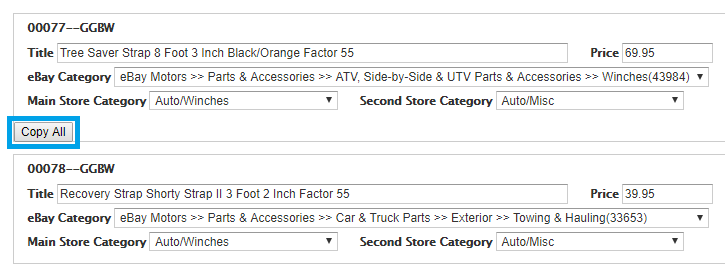
15. Once you finish with the first product, you’ll notice a “Copy All” button. This will copy the two extra categories you chose to the rest of the items you selected, but only those two. It will not change the eBay Category or anything else for the others. Like the image below shows:
16. When you’re finished with these specs, simply scroll to the bottom of the page and click “Next”. The next page will then ask you to confirm your listings to which you can simply click “Confirm”.
17. Next you’ll see a screen with a blue loading bar while your site communcates with eBay, but when it’s finished you might see the same messages as listed in step 8, which is normal.
18. If you go back to your eBay listings page via step 1, you’ll then see the listings you just uploaded. :)